Iun-orok Shrine location and walkthrough in Zelda: Tears of the Kingdom
How to complete the Iun-orok Shrine in Zelda: Tears of the Kingdom, including its location and the full ‘The Right Roll’ walkthrough.
This article references relevant content from the polygon.com website. Original article link: [https://www.polygon.com/zelda-tears-of-the-kingdom-guide/23743693/iun-orok-shrine-right-roll-location-walkthrough]

Iun-orok Shrine is a shrine within The Legend of Zelda: Tears of the Kingdom’s Tabantha Frontier region.
Our guide will help you find the Iun-orok Shrine location, solve its puzzles, and walk you through the “The Right Roll” puzzle to collect the chest and Light of Blessing.
When you’re done, our shrine locations page or interactive Hyrule map can direct you toward something else to do.
Iun-orok Shrine location
Iun-orok Shrine is found within the Tabantha Frontier region. Its exact location is (-3538, 0853, -0133). The closest tower is the Lindor’s Brow Skyview Tower quite a bit to the northeast. Tabantha Bridge Stable and Makurukis Shrine are much closer.
To find this shrine, you’ll have to head into Tanagar Canyon West Cave at the bottom of the canyon below Tabantha Bridge. Navigating the cave involves smashing through a lot of rock walls. Like, a lot of them. Make sure to bring along equipment like hammer weapons and bomb flowers, Zonai time bombs and cannons, and — if you’ve completed the ‘Yunobo of Goron City’ main quest — have the Vow of Yunobo active.
Glide down from the north side of the bridge and cross to the west wall of the canyon. Just a little north, you should spot a Blupee that will lead you into the cave.
Smash your way generally west and then northwest to reach the shrine. Make sure you turn on your Shrine Sensor to keep yourself pointed in the right direction.
Iun-orok Shrine walkthrough
Iun-orok Shrine is, at its core, a challenge about rolling balls down ramps, but it’s so much more infuriating than that.

1. When you enter Iun-orok Shrine, you’ll come to a ramp with a target at the bottom, and a large metal ball to your left.
2. Grab the ball with Ultrahand, place it near the top of the ramp, and let it go.
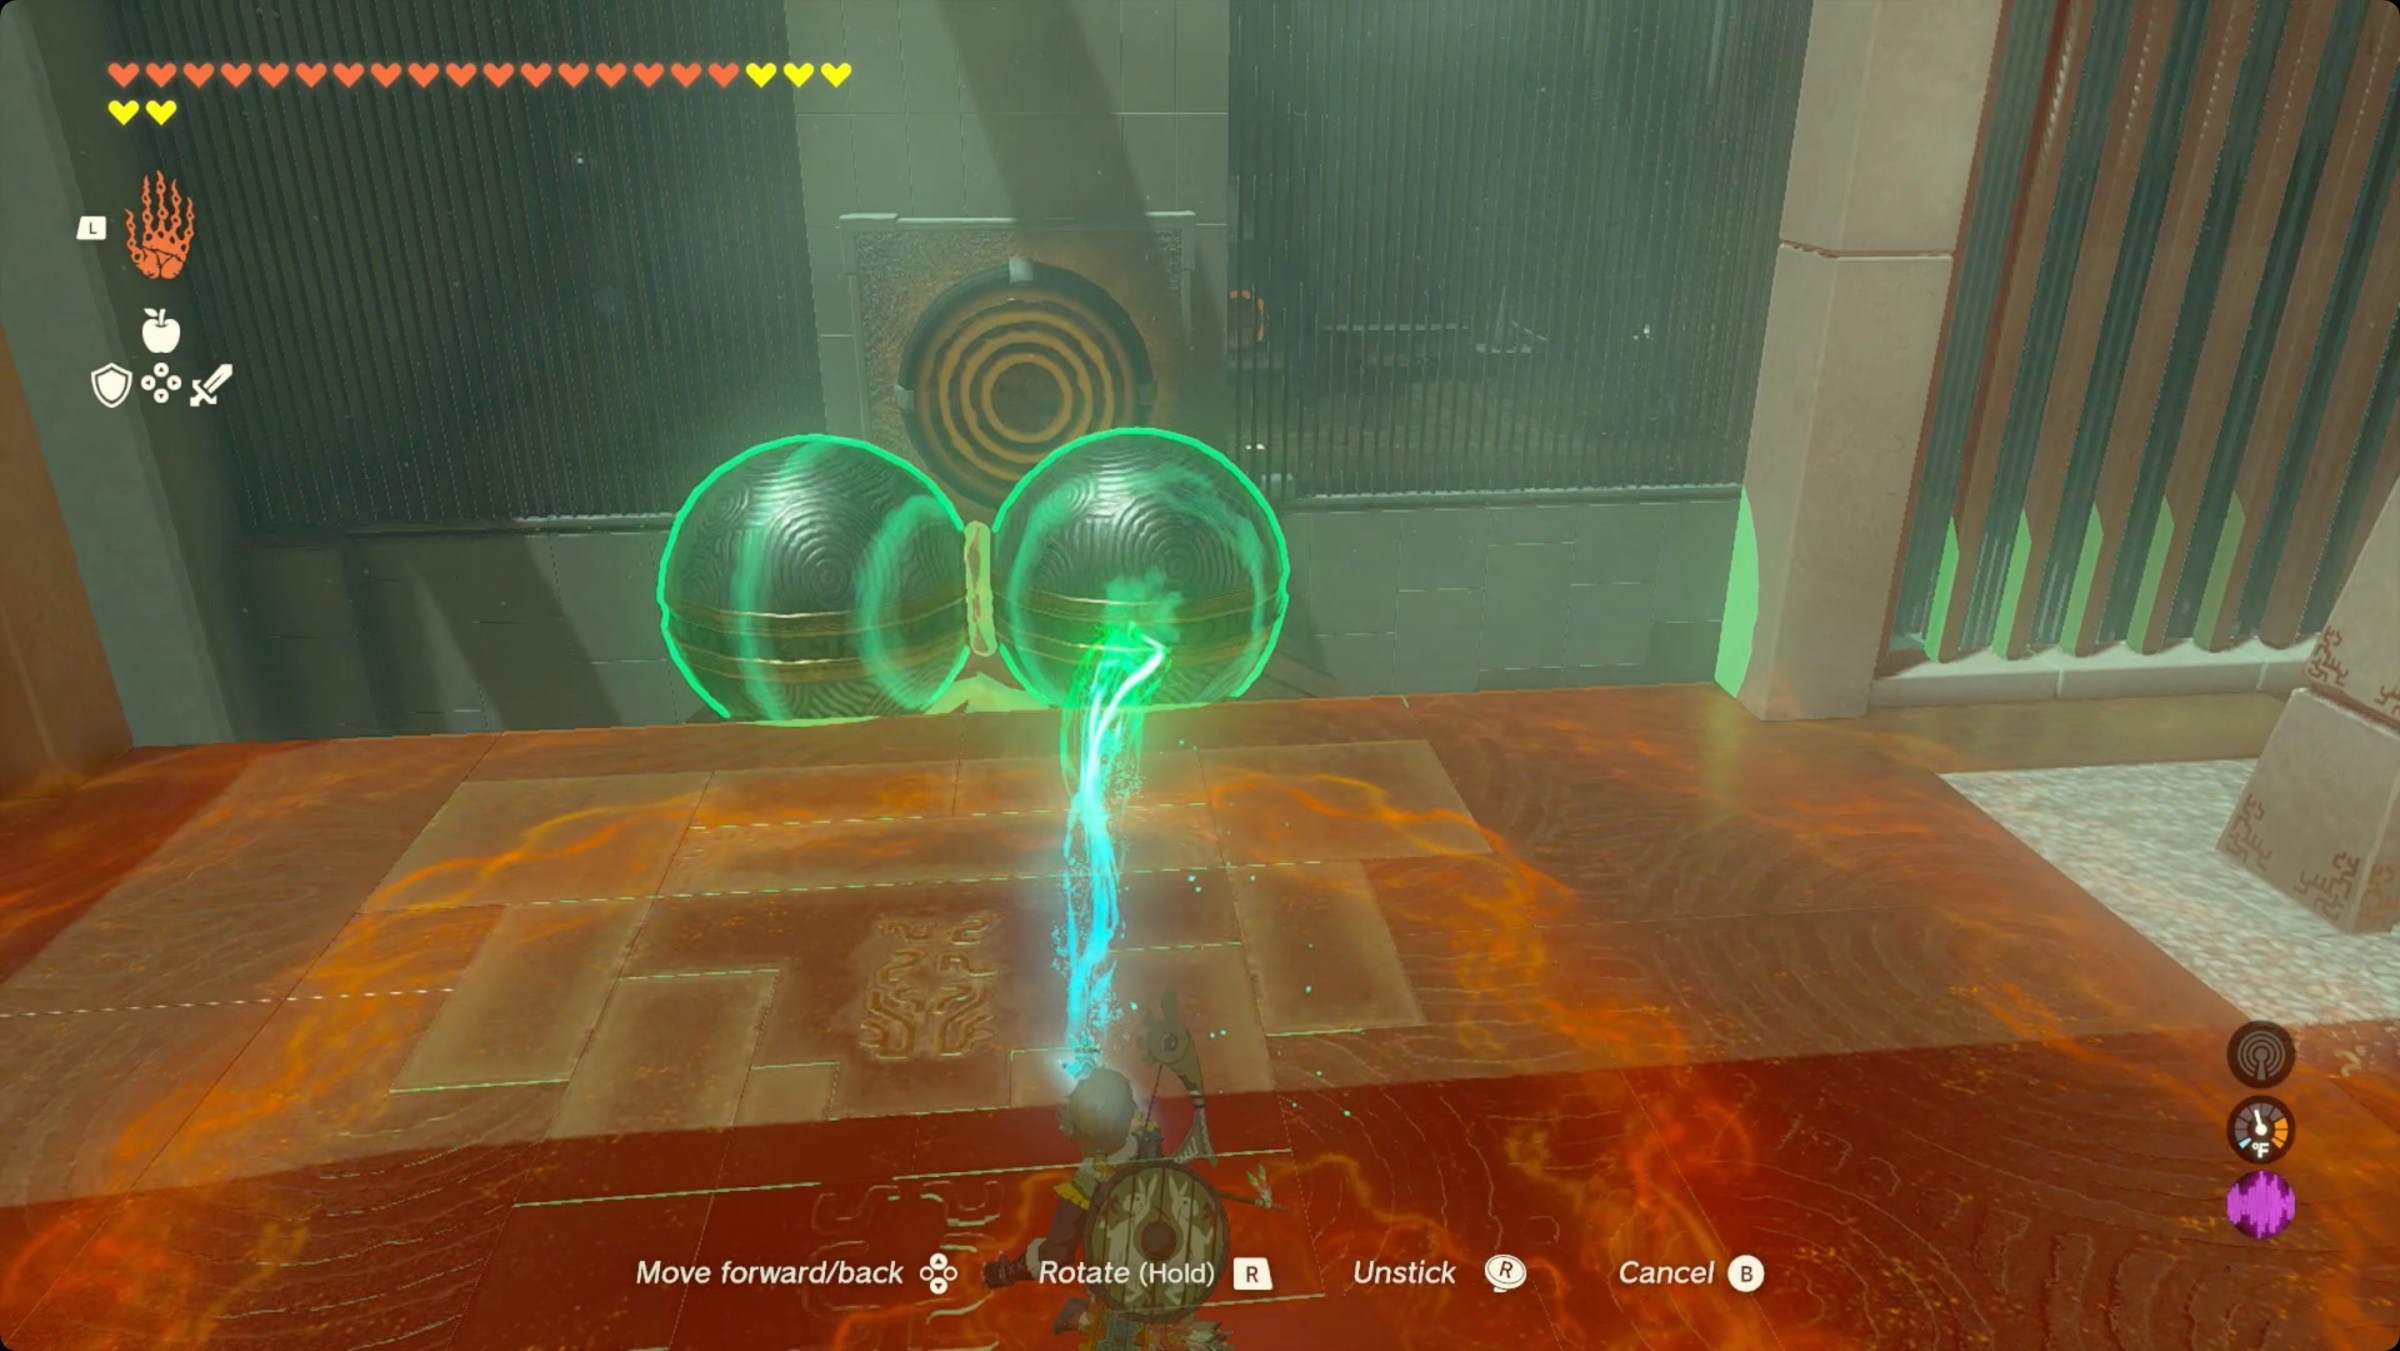
3. Through the gate that opens, you’ll find two balls on your right and a ramp that is rotated 90°.
4. Attach the balls together side by side, and then place that assembly on the ramp so that one ball sits on either side of the peak.
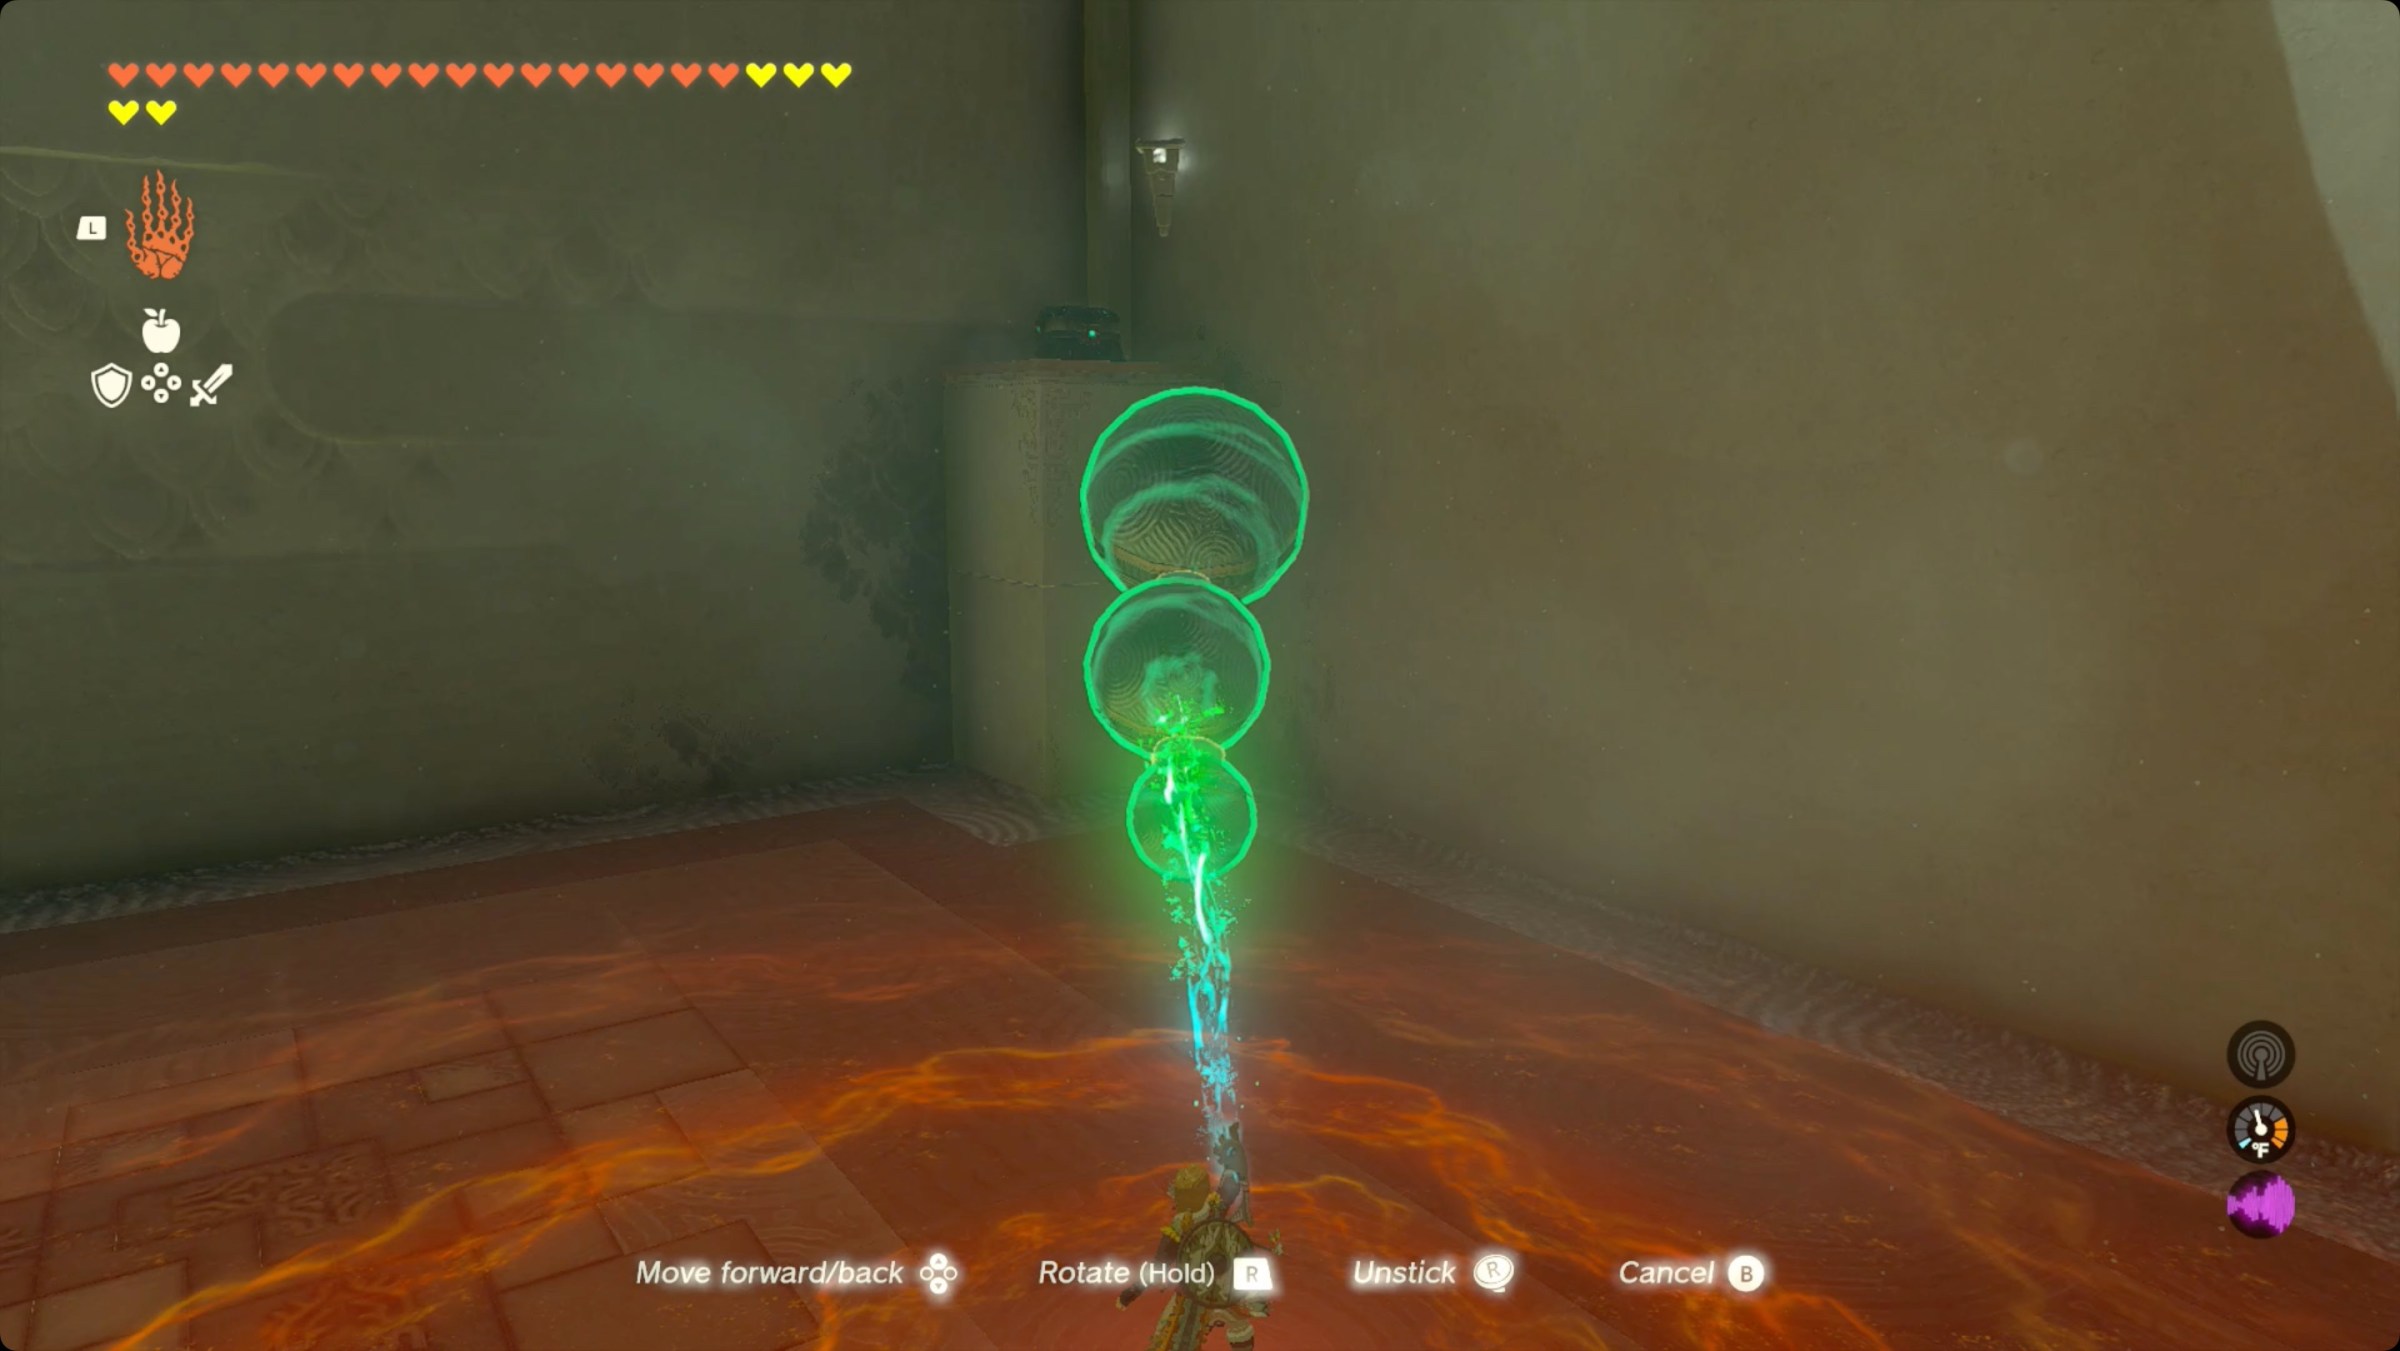
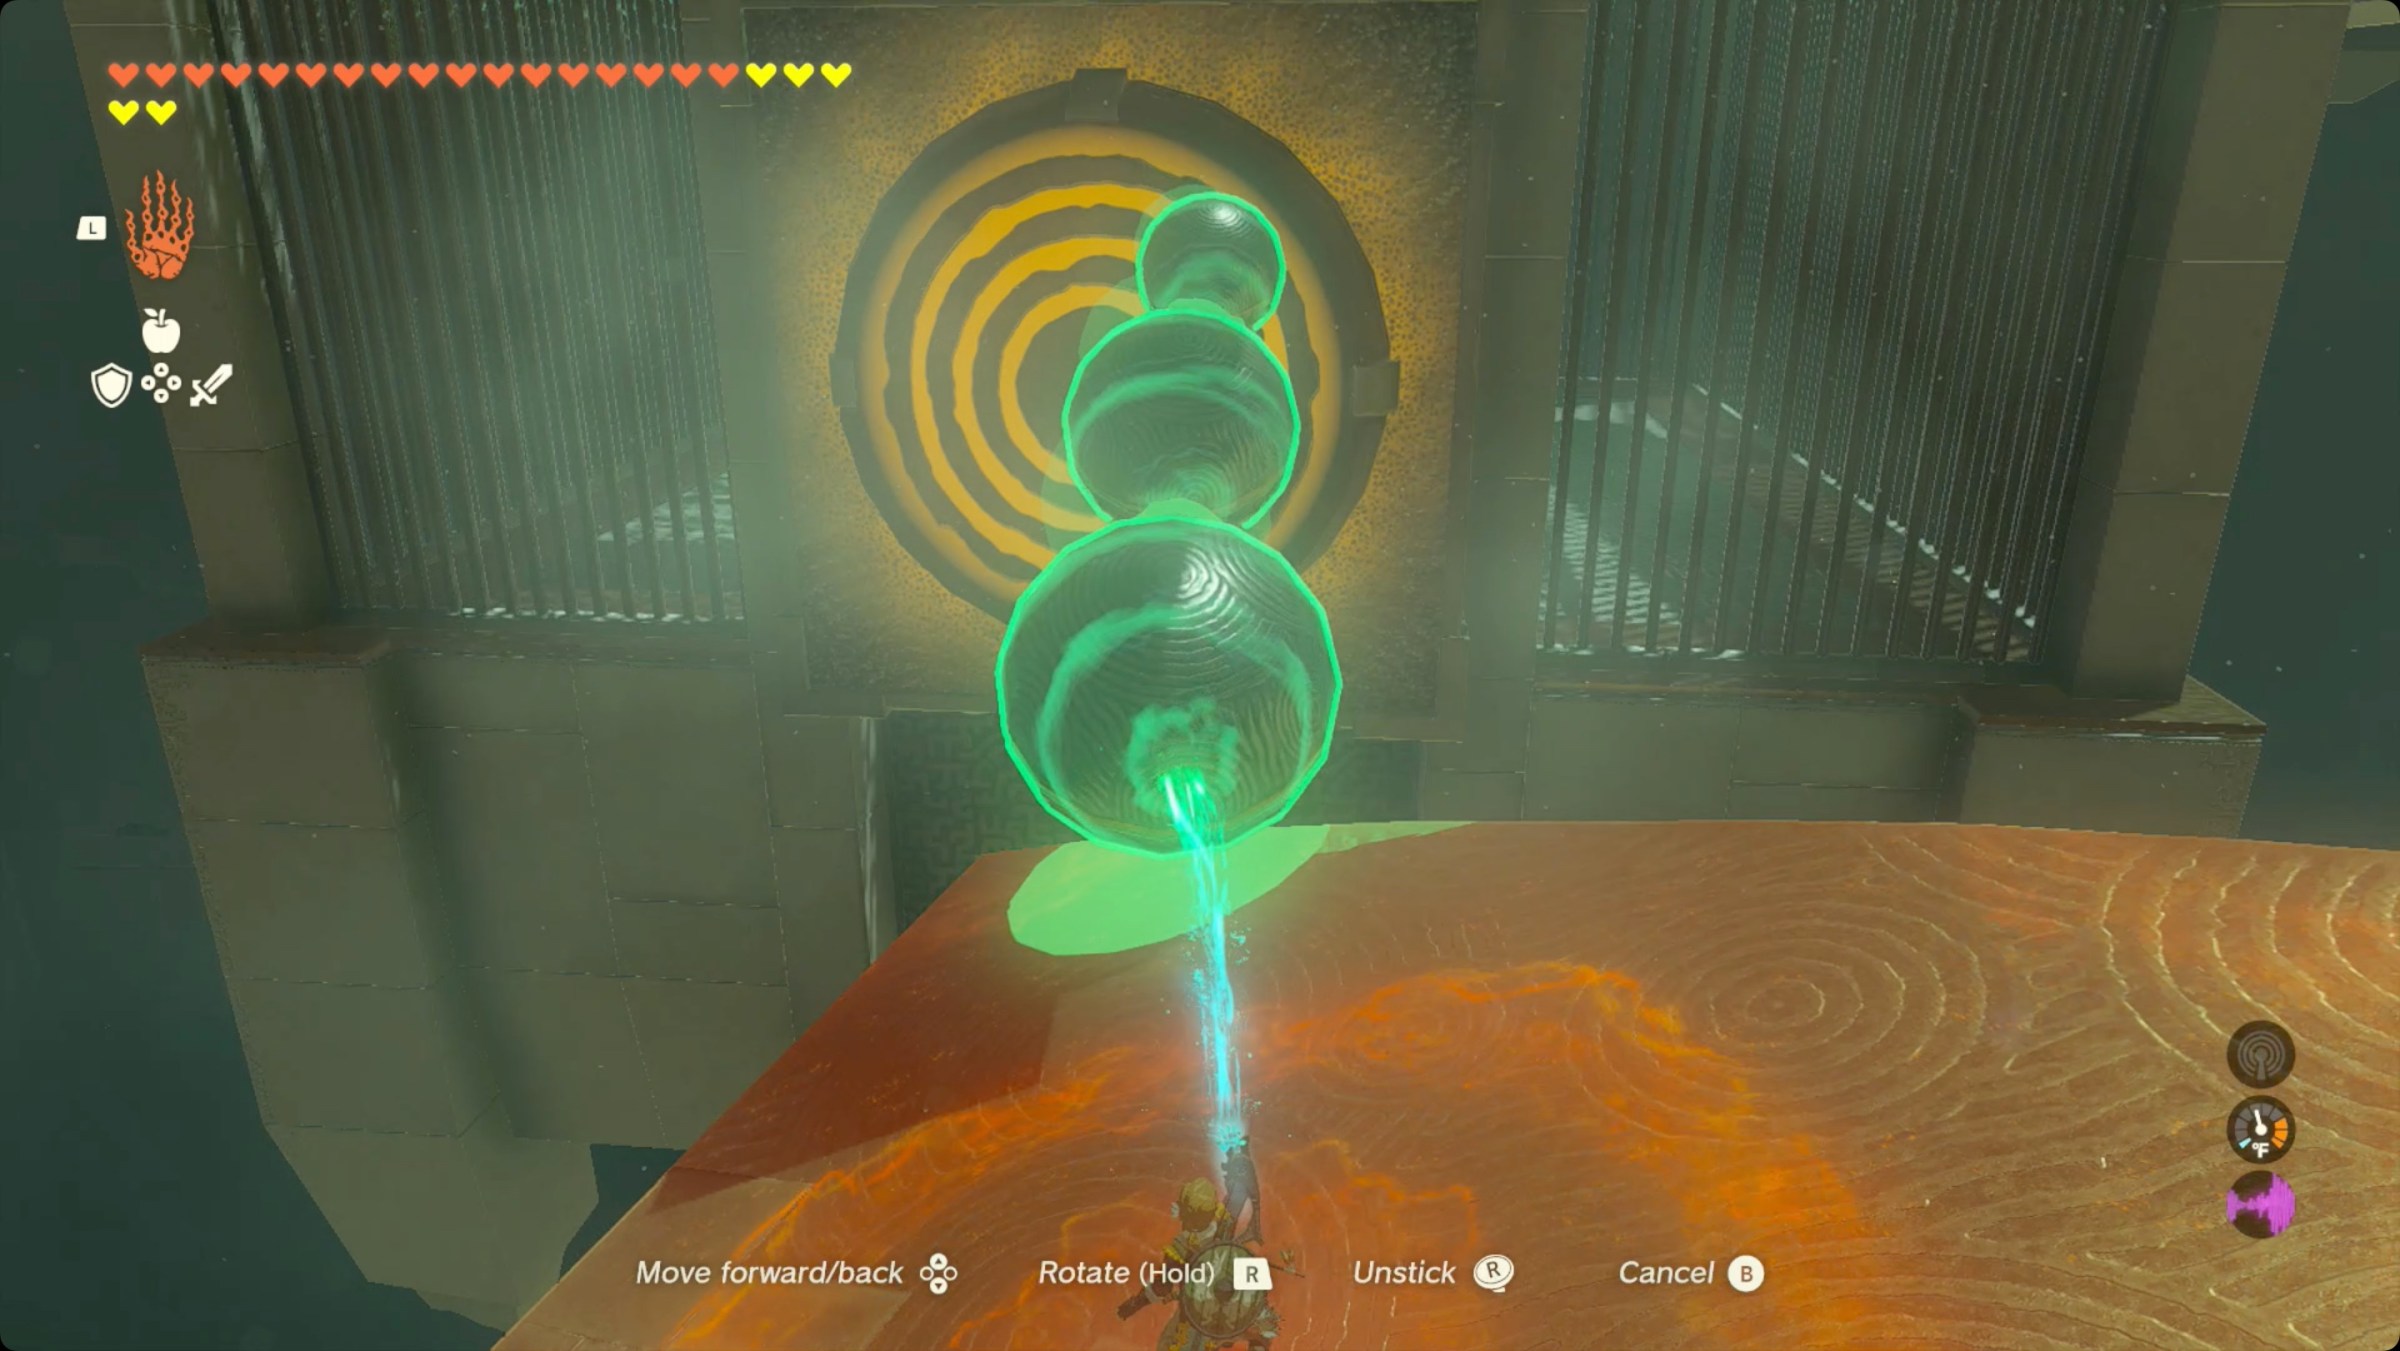
5. In the next room, you’ll find three balls of increasing size ahead of you and a winding ramp off to your right.
6. Before we deal with the ramp, use the balls to make a ladder up to the pillar in the left corner. Open the chest there for a bundle of 10 arrows. (You can also just make yourself an elevator with the smallest ball, Ultrahand, and Recall.)
7. Ostensibly, your task with the ramp is to assemble the balls in such a way that they’ll roll down the ramp and hit the target. After far too much effort, we never got this to work.
8. Instead, assemble the balls into a snowman shape by stacking them in decreasing size.
9. Carry that down to the end of the ramp and tip it away from you.
10. Balance the “snowman” on the edge of the ramp so that when you let go, it falls forward to hit the target. (Even easier than that, you can just attach a bomb flower to an arrow and shoot the target.)
11. Hop through the final gate to collect your Light of Blessing and exit.